How to configure account in Apple Mail?
1. Launch Mail
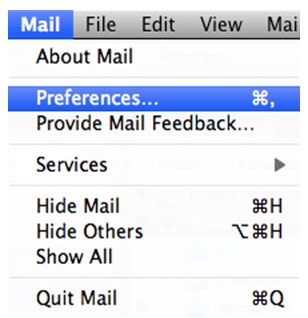
2. If you are launching the Mail for the first time, you will see the "Welcome to Mail" window. If the "Welcome to Mail" assistant does not appear, go to Mail --> Preferences
3. Open the Account tab, and click the plus sign (+) at the bottom to add a new account.
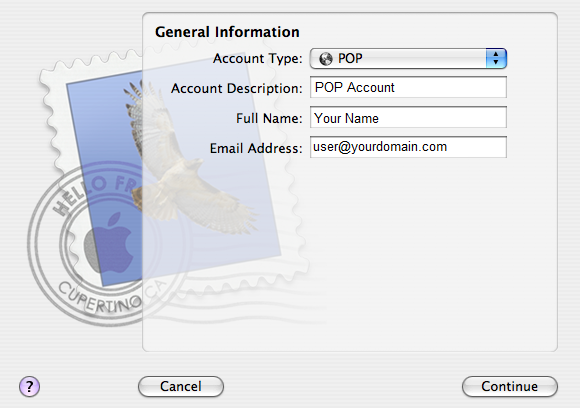
4.The General information will displays:-
a) Choose the proper Account Type.
b) Description — A description of the email address to display in the email account list in Mail.
c) Fill in the Full name
d) Fill in your email address
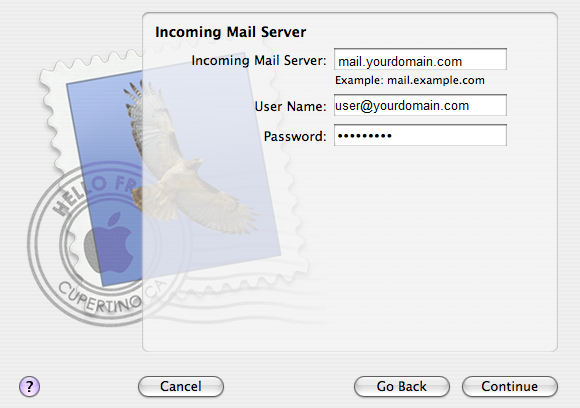
5. The Incoming Mail Server window box displays, enter the following settings and click Continue.
a) Incoming Mail Server — The incoming server name listed in Web-Based Email. eg: mail.yourdomain.com
b) User Name — Your full email address. eg: user@yourdomain.com
c) Password — Your email account password.
6. If prompted, enter your Incoming Mail Security settings. Click Continue to proceed.
* Ensure that you did not checked Use Secure Sockets Layer(SSL) and Authentication is set to Password then click Continue.
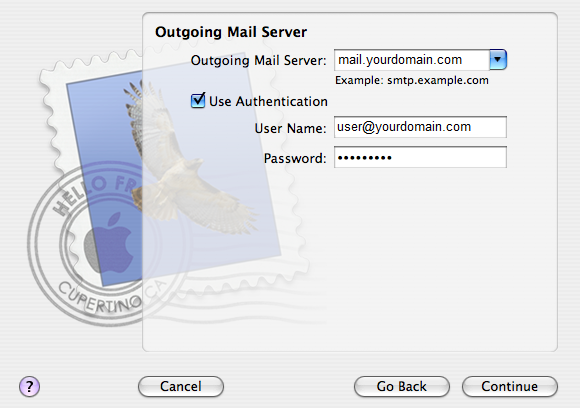
7. The Outgoing Mail Server window box displays, enter the following settings and click Continue.
a) Outgoing Mail Server: mail.yourdomain.com
b) Check Use Authentication
c) Username: user@yourdomain.com
d) Password: Your password
8. If prompted, enter your Outgoing Mail Server Security settings. Click Continue to proceed.
* Ensure that you did not checked Use Secure Sockets Layer(SSL) and Authentication is set to Password then click Continue.
9. Check the “Take account online” checkbox, and click “Create” to complete the process.
Verify Your Account Settings
To ensure AppleMail has the correct account settings:
1. Select Mail --> Preferences and then click Accounts.
2. Select Account Information and then select Edit Server List from the Outgoing Mail Server drop-down.
3. The server list window displays. Select Advanced.
4. Verify that Use SSL is not checked and that the Port is set to 587.
Related Articles
How to configure account in Microsoft Windows Live Mail?
To setup your a new POP3 e-mail account in Microsoft Windows Live Mail, please follow the instruction below :- 01. Select Tools > Accounts... 02. Click on Add button and click on the E-mail Account' then click Next 03. Fill in the following fields ...To set up a mail account on iPhone 5s
Go to Settings > Mail, Contact, Calendars and select Add Account. In the displayed list of email providers, select Other. Then tap Add Mail Account. On the New Account screen, enter the following information: Name. Specify the name that will be ...How to configure account in ThunderBird?
1. Open Thunderbird. 2. Click the 'Tools' menu, and select 'Accounts Settings' 3. Click the Account Actions button. 4. Click Add Mail Account. 5. Enter your name as you would like it to appear on your outgoing mail messages. 6. Click your E-mail ...How to configure account in Microsoft Outlook 2007
To setup your Microsoft Outlook 2007 to handle your new POP3 e-mail account, please follow the instruction below :- 01. Select Tools > Account Settings... 02. Click on the Email tab and click on the New button. 03. Select Microsoft Exchange, POP3, ...How to configure account in Microsoft Outlook 2003?
To setup your Outlook 2003 to handle your new POP3 e-mail account, please follow the instruction below :- 01. Select Tool > Email Accounts... to start the Options dialog box. 02. Click Add a new email account and Next. 03. Click POP3 in Server ...