How to configure account in ThunderBird?
1. Open Thunderbird.
2. Click the 'Tools' menu, and select 'Accounts Settings'
3. Click the Account Actions button.
4. Click Add Mail Account.
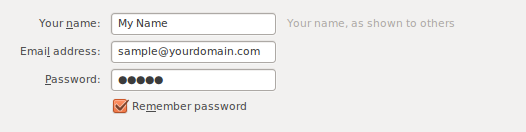
5. Enter your name as you would like it to appear on your outgoing mail messages.
6. Click your E-mail address.
7. Click your E-mail password.
8. Click the Continue button. Thunderbird will now attempt to setup account automatically. It will create an IMAP account and will not use SSL.
9. Once the automatic setup has completed, click on Advanced Config.
10. Enter the information as below.
Incoming:-
Select POP3 should you would like to create POP3 account
Server Hostname: mail.yourdomain.com
Port: 110
Outgoing:-
Server Hostname: mail.yourdomain.com
Port: 587 or 25
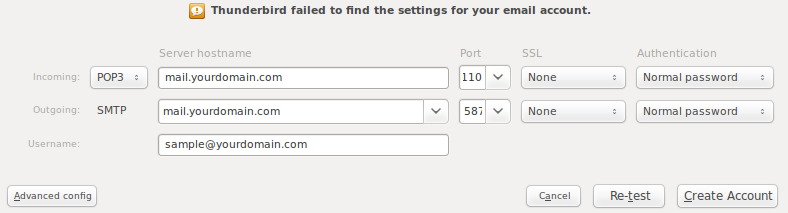
11. Click Create Account.
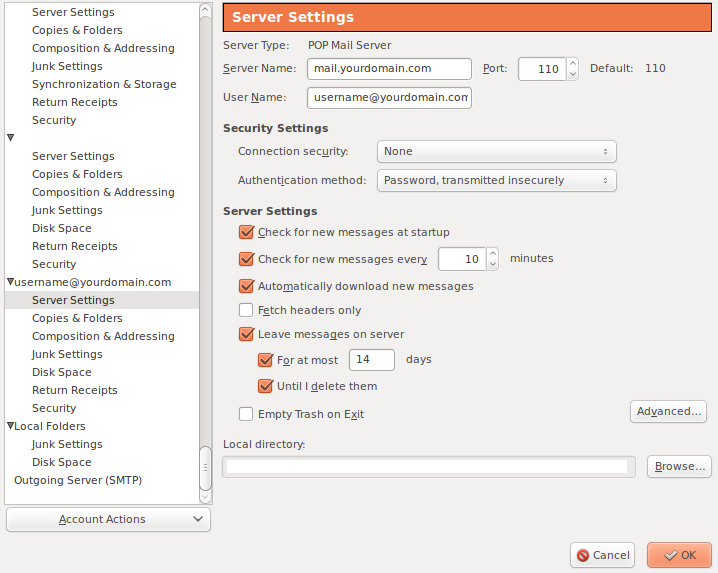
12. Under Security settings section, choose "Password, transmitted insecurely".
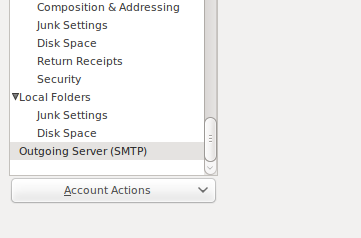
13. Then click on "Outgoing Server (SMTP)".
14. Highlight the email account you just created and click Edit.
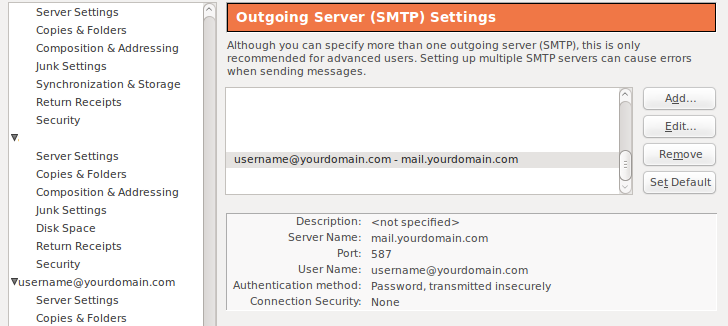
15. Put your username: username@yourdomain.com
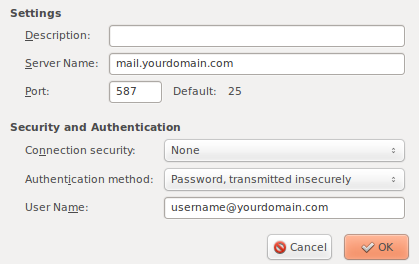
16. Then you're done.
Related Articles
How to configure account in Apple Mail?
1. Launch Mail 2. If you are launching the Mail for the first time, you will see the "Welcome to Mail" window. If the "Welcome to Mail" assistant does not appear, go to Mail --> Preferences 3. Open the Account tab, and click the plus sign (+) at the ...How to configure account in Microsoft Windows Live Mail?
To setup your a new POP3 e-mail account in Microsoft Windows Live Mail, please follow the instruction below :- 01. Select Tools > Accounts... 02. Click on Add button and click on the E-mail Account' then click Next 03. Fill in the following fields ...How to configure account in Microsoft Outlook 2007
To setup your Microsoft Outlook 2007 to handle your new POP3 e-mail account, please follow the instruction below :- 01. Select Tools > Account Settings... 02. Click on the Email tab and click on the New button. 03. Select Microsoft Exchange, POP3, ...How to configure account in Microsoft Outlook 2003?
To setup your Outlook 2003 to handle your new POP3 e-mail account, please follow the instruction below :- 01. Select Tool > Email Accounts... to start the Options dialog box. 02. Click Add a new email account and Next. 03. Click POP3 in Server ...How to configure account in Microsoft Outlook 2010?
1. Open your Outlook. If this is the first time you have open Outlook 2010 then the Startup wizard will show.Then click next. 2. Outlook will ask you if you wish to configure an email account. Select Yes and click Next. 3. Click the File --> Info ...